

Firmware Upgrade Instructions for DWC-PVX20WATX Connection Fix
-----------------------------------
Affected Roles: Administrator
Last Edit: October 3, 2025
-----------------------------------
Firmware Upgrade Instructions
The DWC-PVX20WATX multi-sensor dome camera has been discovered to experience a rare issue where old camera firmware prevents video streaming to DW Spectrum Systems. As a solution, this document with outline instructions on how to implement special versions of plugin and firmware to the camera.
Supported/Affected Devices:
- DWC-PVX20WATX
Deploying the Special Plugin and Firmware Versions
Part 1: Download Files and Prepare the Camera
To download the necessary camera firmware and plugin, use the following links below:
- Special Plugin File for Firmware Upgrade:
- DWC-PVX20WATX Camera Firmware:
Part 2: Prepare Factory Default Conditions
Before uploading and installing the camera firmware and plugin, the camera must be prepared with factory default conditions.
- Connect the DWC-PVX20WATX camera to the network switch through a PoE injector.
- Launch the DW IP Finder application on a computer, connected to the same local network as the camera.
- Scan the network with DW IP Finder to detect the cameras.
- Confirm that all cameras have been assigned the correct IP address by the DHCP server.
- Check that the current Firmware Version is installed on the camera [S13.02.03_20250409].

Part 3: Upload the Special Camera Plugin File
- Open the camera’s web client and log in as the Administrator. If this is the first time that the camera has been accessed, you will be required to create an administrator password.
- You can connect with the camera’s web client by either using the Web feature of DW IP Finder or by manually entering the camera’s IP address and web port (default: 80) into a web browser.
- Once logged in as the Administrator, click the “Setup” button to open the camera settings.
- Navigate to the System > Plugin menu.
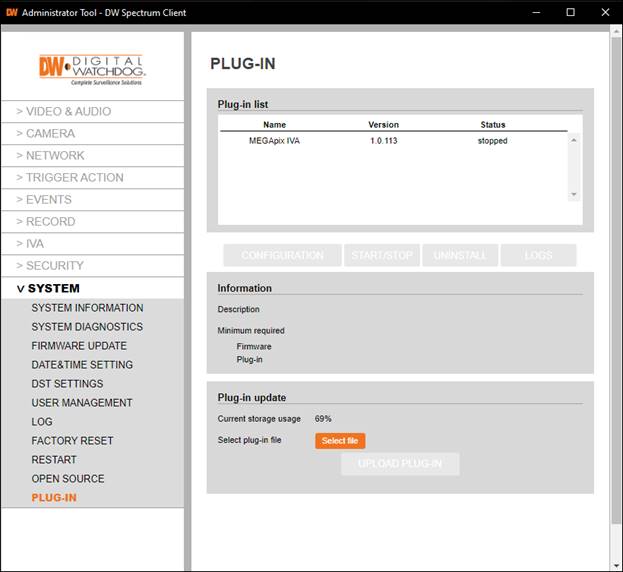
- To upload the plugin, locate the Plug-in update section and click the “Select File” button.
- Locate and select the plugin file (e.g., plugin-fwsafe-V1.0.1-g0b30fb81.l37.enc) that was downloaded in Part 1 of this guide.
Click the “Upload Plug-in” button to install the plugin.
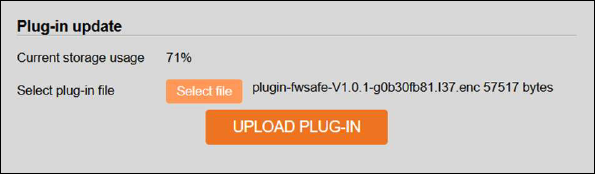
- The camera will upload the plugin and prepare the firmware update mode.
Exit the camera settings menu to the camera’s Live View mode once the plugin upload has finished.

Part 4: Upload the Camera Firmware File
To upload the camera firmware after uploading the updated plugin:
- From the camera’s Live View mode, refresh the camera web page.
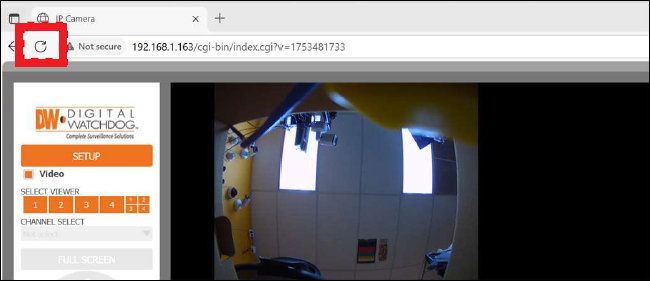
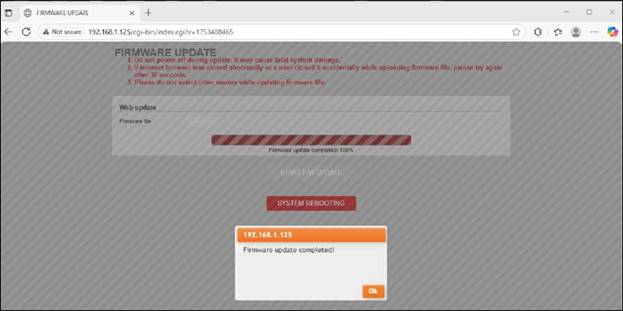
- The Firmware Update menu will display onscreen.
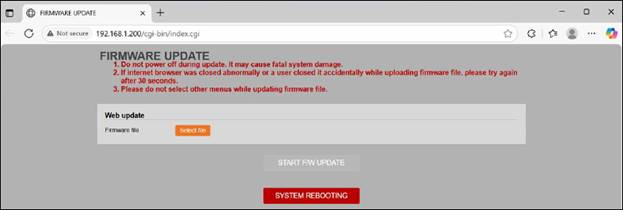
- Click the “Select File” button and select the firmware file (e.g., S13.2.3_20250714) that was downloaded in Part 1 of this guide.
The camera will install the updated firmware. Click the OK button once the update has been completed. The camera will then reboot automatically.
Part 5: Check the Camera Firmware
Once the camera has finished rebooting:
- Open the camera’s Setup menu and navigate to the System > Firmware Update menu.
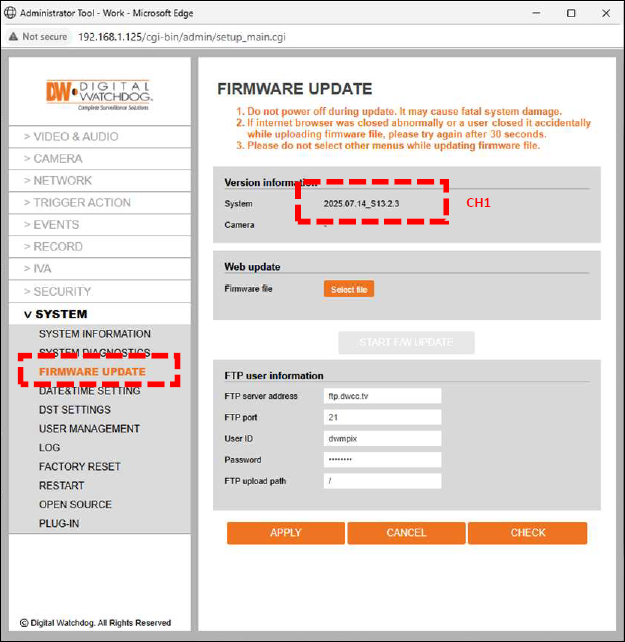
- Check the camera firmware version and confirm that the updated camera firmware has been successfully installed for the Ch-1 lens.
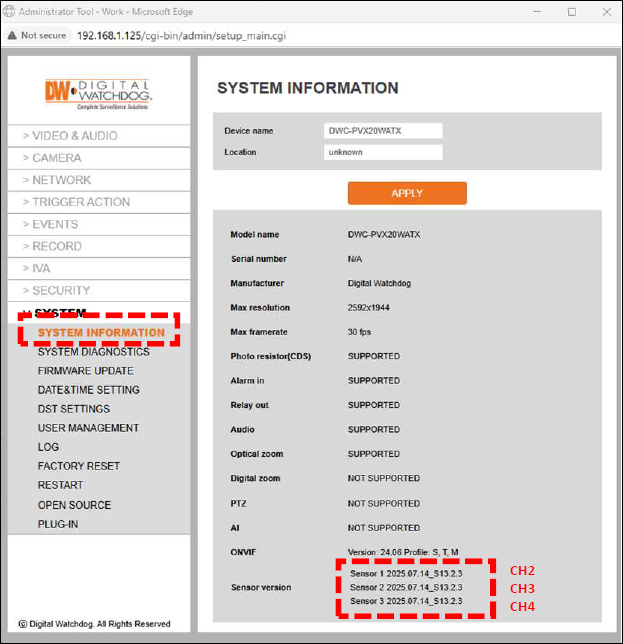
You can verify that the updated camera firmware has been uploaded for the Ch-2 ~ Ch-4 lenses of the camera in the System > System Information menu.
______________________________________________________________________________
For More Information or Technical Support
DW Technical Support: https://www.digital-watchdog.com/contact-tech-support/
DW Sales: [email protected] | www.digital-watchdog.com
Rev: 06/25 Copyright © DW. All rights reserved. Specifications and pricing subject to change without notice. ![]()

